Prototyping Services in Brief
Prototyping services help teams evaluate a physical product before committing to the next project stage. That commitment may involve approving an appearance, demonstrating a lighting concept, refining a functional design, or preparing for tooling.
The right approach depends on what the prototype needs to establish. Materials, fabrication methods, finishes, tolerances, and evaluation criteria should follow that objective.
Global Technology Ventures Inc. (GTV) supports prototyping within the broader Production Lifecycle. Engineering collaboration connects the immediate build to the customer’s intended next stage. The agreed project scope should define specific deliverables, evaluation activities, and responsibilities.
Start With the Decision the Prototype Must Support
A request for a prototype often begins with a drawing, model, and delivery date. Those inputs establish what needs to be built. They may leave an equally important question unanswered: what must the customer learn from it?
A model intended for a presentation requires different planning from a component intended for load testing. A lighting demonstration may prioritize visible appearance and packaging. A production development build may require closer attention to material behavior, dimensional relationships, and assembly variation.
Defining the objective early helps prevent two problems. Teams avoid paying for precision or documentation that adds little value. They also avoid receiving a part that cannot answer the question driving the project.
Recognize Different Prototyping Objectives
| Project objective | Questions the prototype may help answer | Requirements to clarify |
|---|---|---|
| Appearance model | Are proportions, surfaces, colors, and finishes suitable for review? | Viewing conditions, finish references, handling, and presentation expectations |
| Lighting demonstration | Does the concept communicate the intended visual effect and packaging arrangement? | Demonstration conditions, component interfaces, appearance priorities, and functional limits |
| Functional prototype | Does the design perform under defined conditions? | Materials, interfaces, loads, operating conditions, and acceptance criteria |
| Assembly evaluation | Can components be located, accessed, fastened, and serviced as intended? | Mating parts, assembly sequence, allowable adjustments, and critical clearances |
| Production preparation | What must be resolved before tooling or repeated manufacturing? | Intended process, dimensional controls, inspection requirements, and remaining risks |
A project can serve several objectives. However, those objectives may require different parts, finishes, or evaluation methods.
For example, a presentation model may include cosmetic treatments that don’t reflect the final manufacturing process. That is appropriate when everyone understands what its approval covers.
Define Success Before Fabrication
The project brief should establish:
- The decision the build will support.
- The features or characteristics that matter.
- How the customer will evaluate the result.
- The required delivery milestone.
- The limitations that must remain visible.
- The records or supporting information included in scope.
For visual work, acceptance may involve agreed samples or reference images. Functional work may require measurable criteria and defined test conditions.
The level of formality should match the project. A focused discussion can resolve an early concept question. A program approaching tooling needs more detailed requirements and responsibilities.
Understand What a Successful Prototype Establishes
Prototype success has meaning within the purpose and conditions of the build.
An appearance model can satisfy a visual review without representing final material performance. A functional component can pass a test without establishing that production tooling will reproduce its geometry. An assembled prototype can work after adjustment without demonstrating repeatable assembly.
These are boundaries to interpret, rather than automatic reasons to reject the result.
Separate the Immediate Result From the Next Commitment
Consider a hypothetical enclosure program. A printed model confirms that the internal components fit and that connectors remain accessible. That finding can support a packaging decision.
The same model may provide limited information about sealing, thermal behavior, or molded-part distortion. Those questions belong in later evaluation if they matter to the application.
The useful conclusion is specific: the packaging arrangement worked in the reviewed configuration. Broader approval requires additional support.
Before advancing, distinguish:
- What was directly evaluated.
- Which conditions were represented.
- What adjustments influenced the result.
- Which assumptions remain.
- What the next commitment requires.
This distinction becomes more important as changes begin affecting tooling, suppliers, and launch schedules.
Investigate Gaps That Matter to the Project
Production-related gaps deserve attention when manufacturing progression is the next objective. They should not overwhelm an early appearance review.
For programs approaching production, unresolved material differences, assembly adjustments, or inspection questions can justify further investigation. These are among the seven prototype validation gaps that commonly surface late in a production launch.
A useful review identifies the next action: revise the design, clarify a requirement, obtain additional information, or authorize another build.
Choose a Prototyping Method Around the Required Result
Method selection should consider the objective, geometry, materials, finish, quantity, timing, and required accuracy.
CNC machining and additive manufacturing can both support functional prototypes. Both can also contribute to models used for visual or assembly evaluation. Suitability depends on the specific process and application.
The discussion should begin with requirements rather than a preferred machine. Understanding what CNC machining and 3D printing each tests helps narrow the choice.
Where Additive Manufacturing Can Help
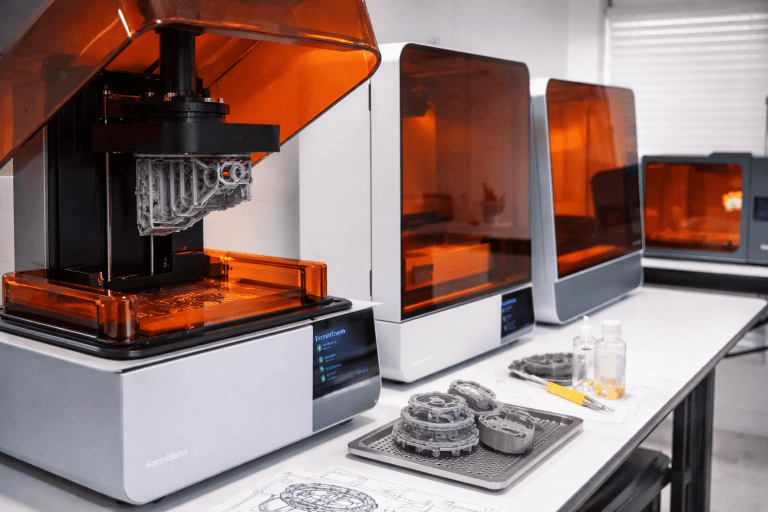
Additive manufacturing can support physical evaluation of complex geometry, packaging arrangements, assembly access, and design alternatives.
It can also support functional testing when the selected material, process, orientation, and finishing meet the test’s needs.
For example, a printed component may help evaluate an assembly sequence or a defined operating function. Its usefulness depends on how closely it represents the characteristics under investigation.
For appearance models, surface preparation and finishing may be important. A raw printed surface may be unsuitable for a presentation even when the underlying geometry is acceptable.
Clarify which properties matter and which process differences could influence the result.
Where CNC Machining Can Help
CNC machining can support selected engineering materials, controlled interfaces, and specified surface or dimensional requirements.
Rapid prototype machining may be appropriate when mating features, material properties, or the condition of a functional surface drives the evaluation.
It can also contribute to appearance models and demonstration assemblies where the chosen material or finish is relevant.
Machining still has limits. Tool access can constrain geometry, and stock material may behave differently from a component produced through another process.
A machined prototype should therefore be assessed against its intended purpose and the planned production route.
When Combining Methods Makes Sense
A program may use a printed model for early packaging reviews and a machined component for a later interface evaluation. A single assembly may combine printed bodies, machined surfaces, and purchased components.
This can be efficient when each element has a defined role.
Document the construction so the customer can interpret the result. A successful hybrid prototype does not automatically establish that a later, differently manufactured configuration will perform identically.
The best method is the one that supports the decision with an appropriate balance of cost, timing, and technical relevance.
Match Materials and Finishes to the Prototype’s Purpose
Material selection should follow the characteristics being evaluated.
For an appearance model, finish, color, texture, translucency, or handling durability may be the priority. For a functional prototype, stiffness, temperature response, wear, or chemical exposure may become more important.
For production preparation, teams also need to consider how the intended manufacturing process affects the finished component.
Decide Where Substitutes Are Acceptable
A substitute material can be appropriate when the project concerns shape, packaging, or presentation.
The substitution becomes problematic when results are used to support conclusions about properties it does not represent.
A hypothetical demonstration housing might use a readily available material to meet a presentation milestone. That can satisfy the brief if the customer understands that thermal or structural performance remains outside the evaluation.
Agree on substitutions before fabrication. Record any limitations relevant to later use.
Consider Material and Process Together
Using the intended material improves the relevance of some evaluations. It does not eliminate differences introduced by processing.
A machined plastic part may differ from a molded part in internal stresses or local behavior. Printed properties can depend on build conditions. Finishing can also affect dimensions or surfaces.
The important question is whether those differences matter to the current objective.
Where they do, identify how the project will address them. The response may involve another build, a different process, customer testing, or specialist evaluation.
Agree on Evaluation and Approval Responsibilities
Choosing a suitable build material is different from formally verifying application performance. The same distinction applies to inspection, documentation, and approval throughout the project.
Before fabrication, clarify:
- Which material specification applies and whether substitutions are permitted.
- Which certificates, inspection records, or other documentation are required.
- Who conducts any testing.
- Who interprets results and approves suitability or the next step.
Record these responsibilities in the quotation or project agreement so neither party assumes the other owns material qualification, inspection, or approval.
Use DFM and DFA Before Manufacturing Commitments Increase
As a program moves toward manufacturing, design decisions need to account for how parts will be produced and assembled.
Design for Manufacturability and Design for Assembly support can help identify constraints before they become embedded in tooling or repeated operations.
The review depth should match the stage. An early visual model may not need a detailed production analysis. A design approaching tooling requires closer attention to the intended route.
Review Features That Drive Manufacturing Difficulty
Relevant questions may include:
- Can tools reach the required features?
- Are process-sensitive sections appropriate?
- Which surfaces require additional operations?
- Are critical features accessible for inspection?
- Do tolerances reflect functional requirements?
- Could a design change simplify fabrication without compromising performance?
The purpose is to identify decisions that affect feasibility, cost, and control.
Applying unnecessarily tight tolerances across a component can increase effort without improving its function. Leaving a critical relationship poorly defined can create a different problem: parts that meet individual requirements but fail in use.
Evaluate How the Assembly Will Be Built
Assembly evaluation should consider locating features, fastening access, sequence, handling, and required adjustments.
A designer may assemble a prototype successfully using knowledge that has never been documented. Production personnel may not have that context.
In a hypothetical bracket assembly, tightening fasteners could shift a mating feature out of alignment. The cause might involve locating strategy, stiffness, or sequence.
The next action should address that interaction. Simply making another identical prototype may repeat the problem without explaining it.
Assign actions from the review and confirm which changes need evaluation before the next commitment.
Decide Which Dimensions and Inspection Records Matter
Dimensional evaluation should focus on requirements that affect the project’s intended result.
An appearance model may need controlled overall dimensions and visible gaps. An assembly prototype may require close attention to locating features. A precision functional component may need a more detailed inspection plan.
The required records should be agreed before fabrication.
Connect Measurements With Function
An inspection result becomes more useful when the team understands the relationship it represents.
A hole’s diameter may be acceptable while its position relative to another feature creates interference. Several individually acceptable components may accumulate variation that affects the assembly.
Identify the critical relationships before choosing what to measure.
For production-oriented work, this may involve datum strategy, tolerance analysis, assembly evaluation, and measurement planning. The appropriate activities depend on the design and agreed responsibilities.
Clarify How Conformance Will Be Evaluated
Customers and suppliers should agree on the relevant drawing revision, acceptance criteria, and measurement expectations.
Where results could depend on part support, restraint, or measurement technique, those conditions also need attention.
Otherwise, different teams can reach conflicting conclusions about the same component.
Include any requested measurements, inspection reports, or material identification in the agreed scope.
Keep Prototype Conformance Separate From Process Capability
A conforming prototype establishes a result for the measured part. It does not establish sustained manufacturing performance, which explains why parts that meet prototype tolerances can still fail in production.
Programs progressing into production may require additional evidence across representative conditions. The sampling approach and measurement system should suit the decision being made.
The pillar-level decision is straightforward: determine whether the current dimensional evidence supports the next step, or whether further investigation is needed.
Plan the Next Iteration Around What Remains Unresolved
Iteration should resolve a defined question.
That question may concern visual appearance, demonstration performance, assembly access, material behavior, or manufacturing readiness. The appropriate next build depends on what remains uncertain.
There is no fixed number of iterations that makes a project complete.
Give Changes a Clear Purpose
Before authorizing another build, establish what will change and how the result will be assessed.
For an appearance model, that might mean reviewing a revised surface transition or finish sample. For a functional prototype, it might mean evaluating an interface under specified conditions.
For a production development build, it may involve investigating an assembly adjustment or a process-sensitive feature.
Changing several unrelated details together can complicate interpretation. Where combined changes are necessary, plan how their effects will be reviewed.
Preserve the Configuration Behind the Result
Teams need to know which design, material, and build conditions produced the observed outcome.
The required documentation can vary. Early visual iterations may need an agreed revision and review record. More demanding programs may require detailed traceability.
Changes should also prompt a review of earlier findings. A revised finish may affect appearance approval. A fastening change may affect alignment. A material substitution may limit the relevance of previous testing.
The objective is to avoid carrying forward approval that no longer matches the configuration.
Prepare for Tooling and Low-Volume Production When the Program Requires It
For programs advancing into manufacturing, tooling represents a larger commitment to the design and process assumptions.
Preparation should identify which decisions are sufficiently supported and which remain open.
This does not require every uncertainty to disappear. It requires a clear understanding of the risks, planned actions, and approval responsibilities.
Translate Findings Into Tooling Requirements
Tooling and fixture planning should account for relevant prototype findings.
These may concern critical interfaces, locating strategy, assembly access, material requirements, or inspection needs.
The tooling team needs enough context to understand why a feature matters. Geometry alone may not communicate the functional relationship or previous development issue.
Confirm what information the customer, GTV, and any other supplier will provide. Identify who releases requirements and approves changes.
Give Low-Volume Production a Defined Purpose
Low-volume production can help evaluate conditions that isolated prototypes did not represent.
Depending on the program, objectives may include:
- Repeated dimensional results.
- Assembly sequence and labor requirements.
- Tooling or fixture performance.
- Inspection practicality.
- Material and configuration traceability.
- Response to nonconforming output.
A completed quantity is not sufficient evidence on its own. The run should generate information relevant to the next decision.
Where trial conditions differ from the intended production environment, record the differences and determine whether further work is needed.
Prepare Information for the Receiving Team
Manufacturing may continue with the development partner or transfer to another qualified supplier.
Either route requires clear information about the configuration, requirements, and remaining issues.
The transfer package should match the program. It may include drawings, material specifications, assembly instructions, inspection requirements, tooling information, and relevant evaluation records.
Confirm who owns each document and which approvals apply, so knowledge transfers without implying that the development partner owns the entire release process.
Evaluate a Prototyping Partner Against the Project Scope
Choosing among rapid prototyping companies involves more than comparing fabrication prices.
The relevant question is whether the proposed scope supports the customer’s objective.
An appearance-model inquiry should address finish expectations and presentation conditions. A functional prototype inquiry should identify required materials and evaluation needs. A manufacturing-oriented inquiry should explain the intended process and upcoming commitment.
Compare Like-for-Like Proposals
Review quotations for differences in:
- Materials and permitted substitutions.
- Fabrication and finishing.
- Engineering review activities.
- Required quantities.
- Inspection and documentation.
- Customer-supplied components.
- Delivery milestones.
- Responsibilities for testing and approval.
A lower price may reflect a narrower scope. A longer schedule may include additional review or finishing work.
Clarifying those differences helps purchasing and technical teams make a shared decision.
Consider Proximity Alongside Technical Fit
Teams comparing 3D printing companies in Michigan may value physical reviews, local coordination, or easier part exchanges.
Those benefits should be assessed alongside capability, capacity, communication, and the proposed approach.
The same applies when evaluating rapid prototyping companies elsewhere in the USA. Location supports the project when it improves collaboration or execution. It does not replace a clear technical and commercial agreement.

How GTV Connects Prototyping With the Production Lifecycle
GTV’s Production Lifecycle provides context for connecting the current project stage with what follows.
For some customers, the immediate requirement is an appearance model or demonstration. Others need functional prototypes, precision components, tooling, fixtures, or low-volume production support.
The conversation should establish the relevant stage, objective, and scope, including which activities GTV will perform and where other project partners are involved.
Engineering collaboration can help connect design information with material choices, fabrication requirements, and critical interfaces. For programs continuing toward production, relevant findings can inform later tooling and manufacturing discussions.
Production confidence is the customer outcome: each decision is better supported as the program advances, within the acceptance requirements and responsibilities agreed for the project.
A Practical Review Before the Next Commitment
Use the following questions to organize the next project discussion.
| Decision | What to clarify |
|---|---|
| What is the immediate objective? | Appearance, demonstration, function, assembly, or manufacturing preparation |
| What must the prototype represent? | Geometry, finish, materials, interfaces, and relevant operating conditions |
| What differences are acceptable? | Substitutions, process limitations, and excluded requirements |
| How will success be evaluated? | Review method, acceptance criteria, required records, and responsible parties |
| What remains unresolved? | Open questions, consequences, owners, and next actions |
| What follows this build? | Design approval, another iteration, tooling, low-volume production, or another milestone |
The review should produce a clear next action and an agreed scope for carrying it out.
Let’s Review Your Project Together
Bring the current drawings or CAD models, intended quantities, required timing, and the question driving the project.
For appearance or demonstration work, include finish references, viewing conditions, and presentation expectations. For functional or production-oriented work, include material requirements, critical interfaces, available findings, and the intended manufacturing route.
Let’s Review Your Project Together to clarify the next decision and the support required.